
How Dry Age Bags Work
Unique Tublin® breathable membrane technology creates a perfect dry curing environment in any modern frost free refrigerator. The membrane sticks to the proteins in meat, allowing it to breath but keeping bacteria out.
No special drying chamber is necessary and no need to monitor humidity. Create Dry Sausage like salami, pepperoni and many more in your refrigerator with this special technology or make your own capicola, bresaola, prosciutto, pancetta or dry aged steak with no mess, no odours. Also great for aging hard cheeses!
Your result is delicious dry cured meats that will impress your friends and family.
Follow the process below for all your dry ageing no matter what the product.


Always Crinkle the Bag
Because the membrane is very smooth, we need to create a surface that allows the air to be sucked out during vacuum sealing. Once your product is in the bag, give the end a good scrunch with your hand.
NOTE: Ideally you should have approx 100mm of bag at the top of your product to assist with the sealing process, so if needed trim your bag length prior to crinkling.
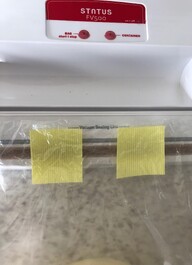
Use the Vac Strip
To further assist the air to be sucked out, use the yellow vac strip supplied with your bag. Cut in half and place between the layers of the bag with the corrugation running vertically.

Suck It
Use your vacuum sealer as you usually would and suck the air out of the bag.
If you are struggling to get all the air out, don't panic! The bag will still work as long as it is in contact with at least 80% of the surface of your product. You can also use butchers netting over the top if required.

Double Seal to Prevent Leaks
It is recommended to do a second heat seal to prevent any leakage of air during the curing process.
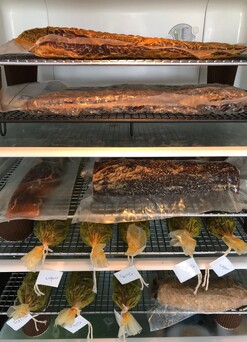
Rack it Up
Place your sealed product on a rack in a regular frost free refrigerator and dry age for the recommended time or percentage of weight loss. The rack allows the air to circulate around the product and enables drying on all sides.

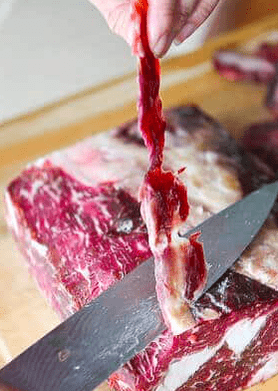
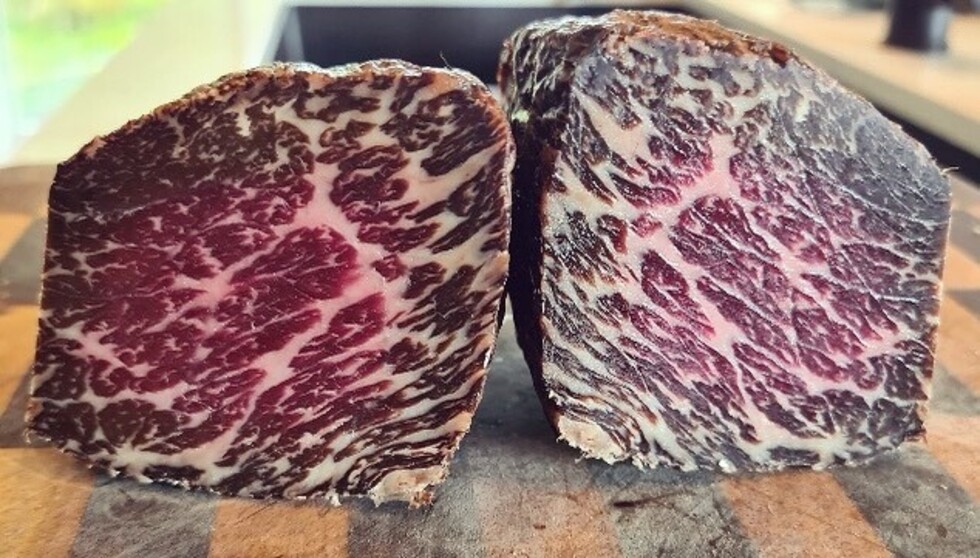
How to Trim Steak Cut's When Ready
If you are dry ageing a whole cut of meat for steaks, then when it's ready it will look something like this. The meat will have a crust, or pellicle, which is hard and this needs to be trimmed off.
Trim all of the pellicle off with a sharp knife. Then cut the steaks to your desired thickness.
The longer you leave it to age, the harder the pellicle will become. If you want minimal meat loss then only age for 25-30 days.


Tip's & Trick's
A frequent question that we get asked about our dry age bags is, what if the bag is too wide to fit in the vacuum sealer? Easy answer is to seal across one or both corners first to narrow the gap that you will use to suck the air out as in this picture.
If you don't have a vacuum sealer, all is not lost! You can use butchers netting to keep the bag bonded to the meat. Just roll any excess bag up into a tight roll before putting the netting on as you don't want the bag doubled over the meat as this will stop correct airflow.
If the bag is too wide for the meat, just roll up the extra as per this picture. You don't want to double it back over the meat as this will inhibit airflow.